In a nutshell
Master wallets are the backbone of Blockradar’s infrastructure. They enable you to manage stablecoin deposits across multiple blockchains, generate dedicated addresses for customers, auto-sweep funds, and initiate withdrawals—all from a single wallet per chain.
Master wallets are the backbone of Blockradar’s infrastructure. They enable you to manage stablecoin deposits across multiple blockchains, generate dedicated addresses for customers, auto-sweep funds, and initiate withdrawals—all from a single wallet per chain.
Prerequisites
Before creating and managing wallets, ensure you have:Blockradar Account
Sign up at dashboard.blockradar.co and complete your account setup.
API Key
Generate an API key from Dashboard → Developers in the dashboard. You’ll need this for all API operations.
Select Environment
Choose between Testnet (for development) or Mainnet (for production). Wallets are isolated per environment.
Choose Blockchain
Decide which blockchain(s) you need. View supported blockchains and assets to see available options.
How It Works
Master wallets let you manage stablecoin deposits across multiple blockchains supported by Blockradar. When you create a master wallet for a specific blockchain, it allows you to manage everything related to that blockchain with the master wallet:- Generating dedicated addresses for your customers to use for depositing stablecoins on multiple blockchains.
- Whitelisting externally managed addresses for stablecoin deposit monitoring.
- Auto-sweeping: every stablecoin deposited to any of the dedicated addresses is automatically swept into the master wallet.
- Withdrawals: you can easily initiate stablecoin withdrawals from the master wallet address to an external address.
Creating a Wallet
The creation of a master wallet requires four steps:- Select the blockchain you want to create the wallet for.
- Add the stablecoins that you need this master wallet to support.
- Configure your wallet webhook URL. This will be used for notifications and data synchronization when stablecoins are deposited into any of the dedicated addresses generated through this wallet.
- Fund the master wallet. To enable auto-sweeping of stablecoins from the dedicated addresses to the master wallet and withdrawal to external address, you need to maintain a balance of the native asset on the blockchain in this master wallet.
One dedicated address generated via any of these master wallets can be used to receive deposits on all other blockchain master wallets, provided the blockchains have
isEvmCompatible: true.This means you can issue your customers a single unique address that can be used to deposit stablecoins on multiple blockchains, without worrying about them sending stablecoins to the wrong blockchain.Create a Master Wallet
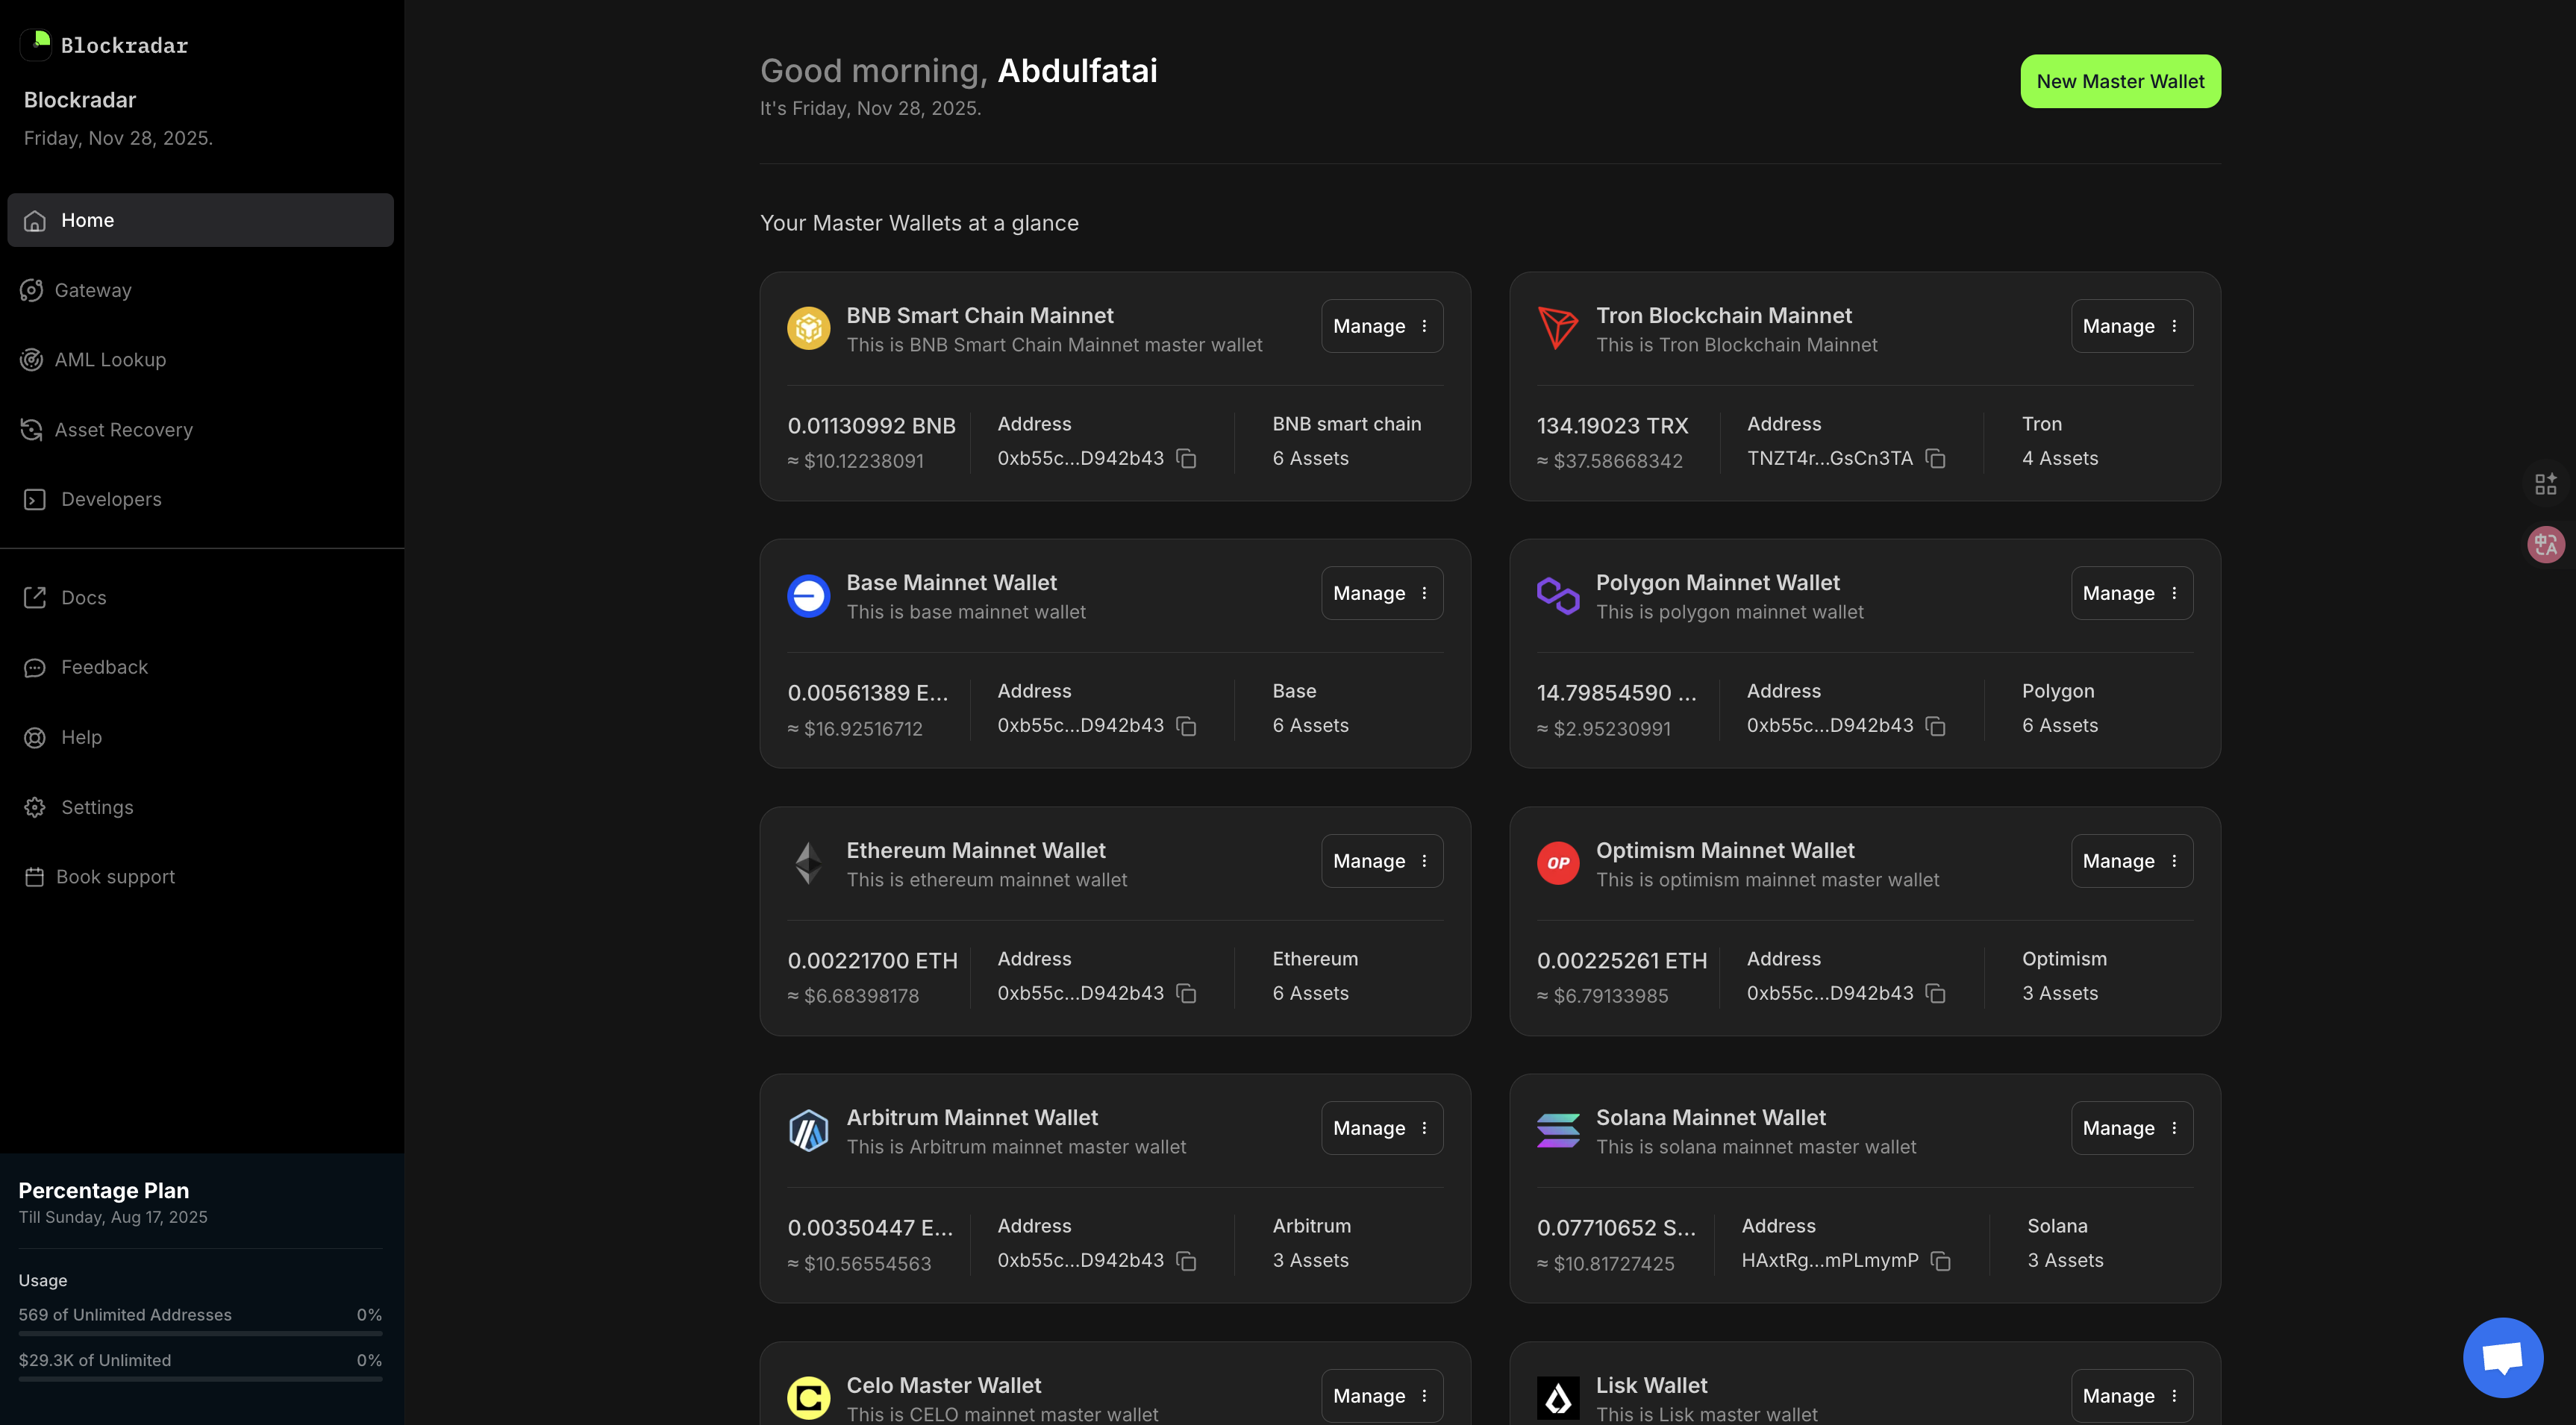
To create a master wallet, go to the dashboard, navigate to the wallets section, and create a wallet to start building a seamless experience for your customers. The Blockradar dashboard provides a simple, user-friendly interface for generating master wallet.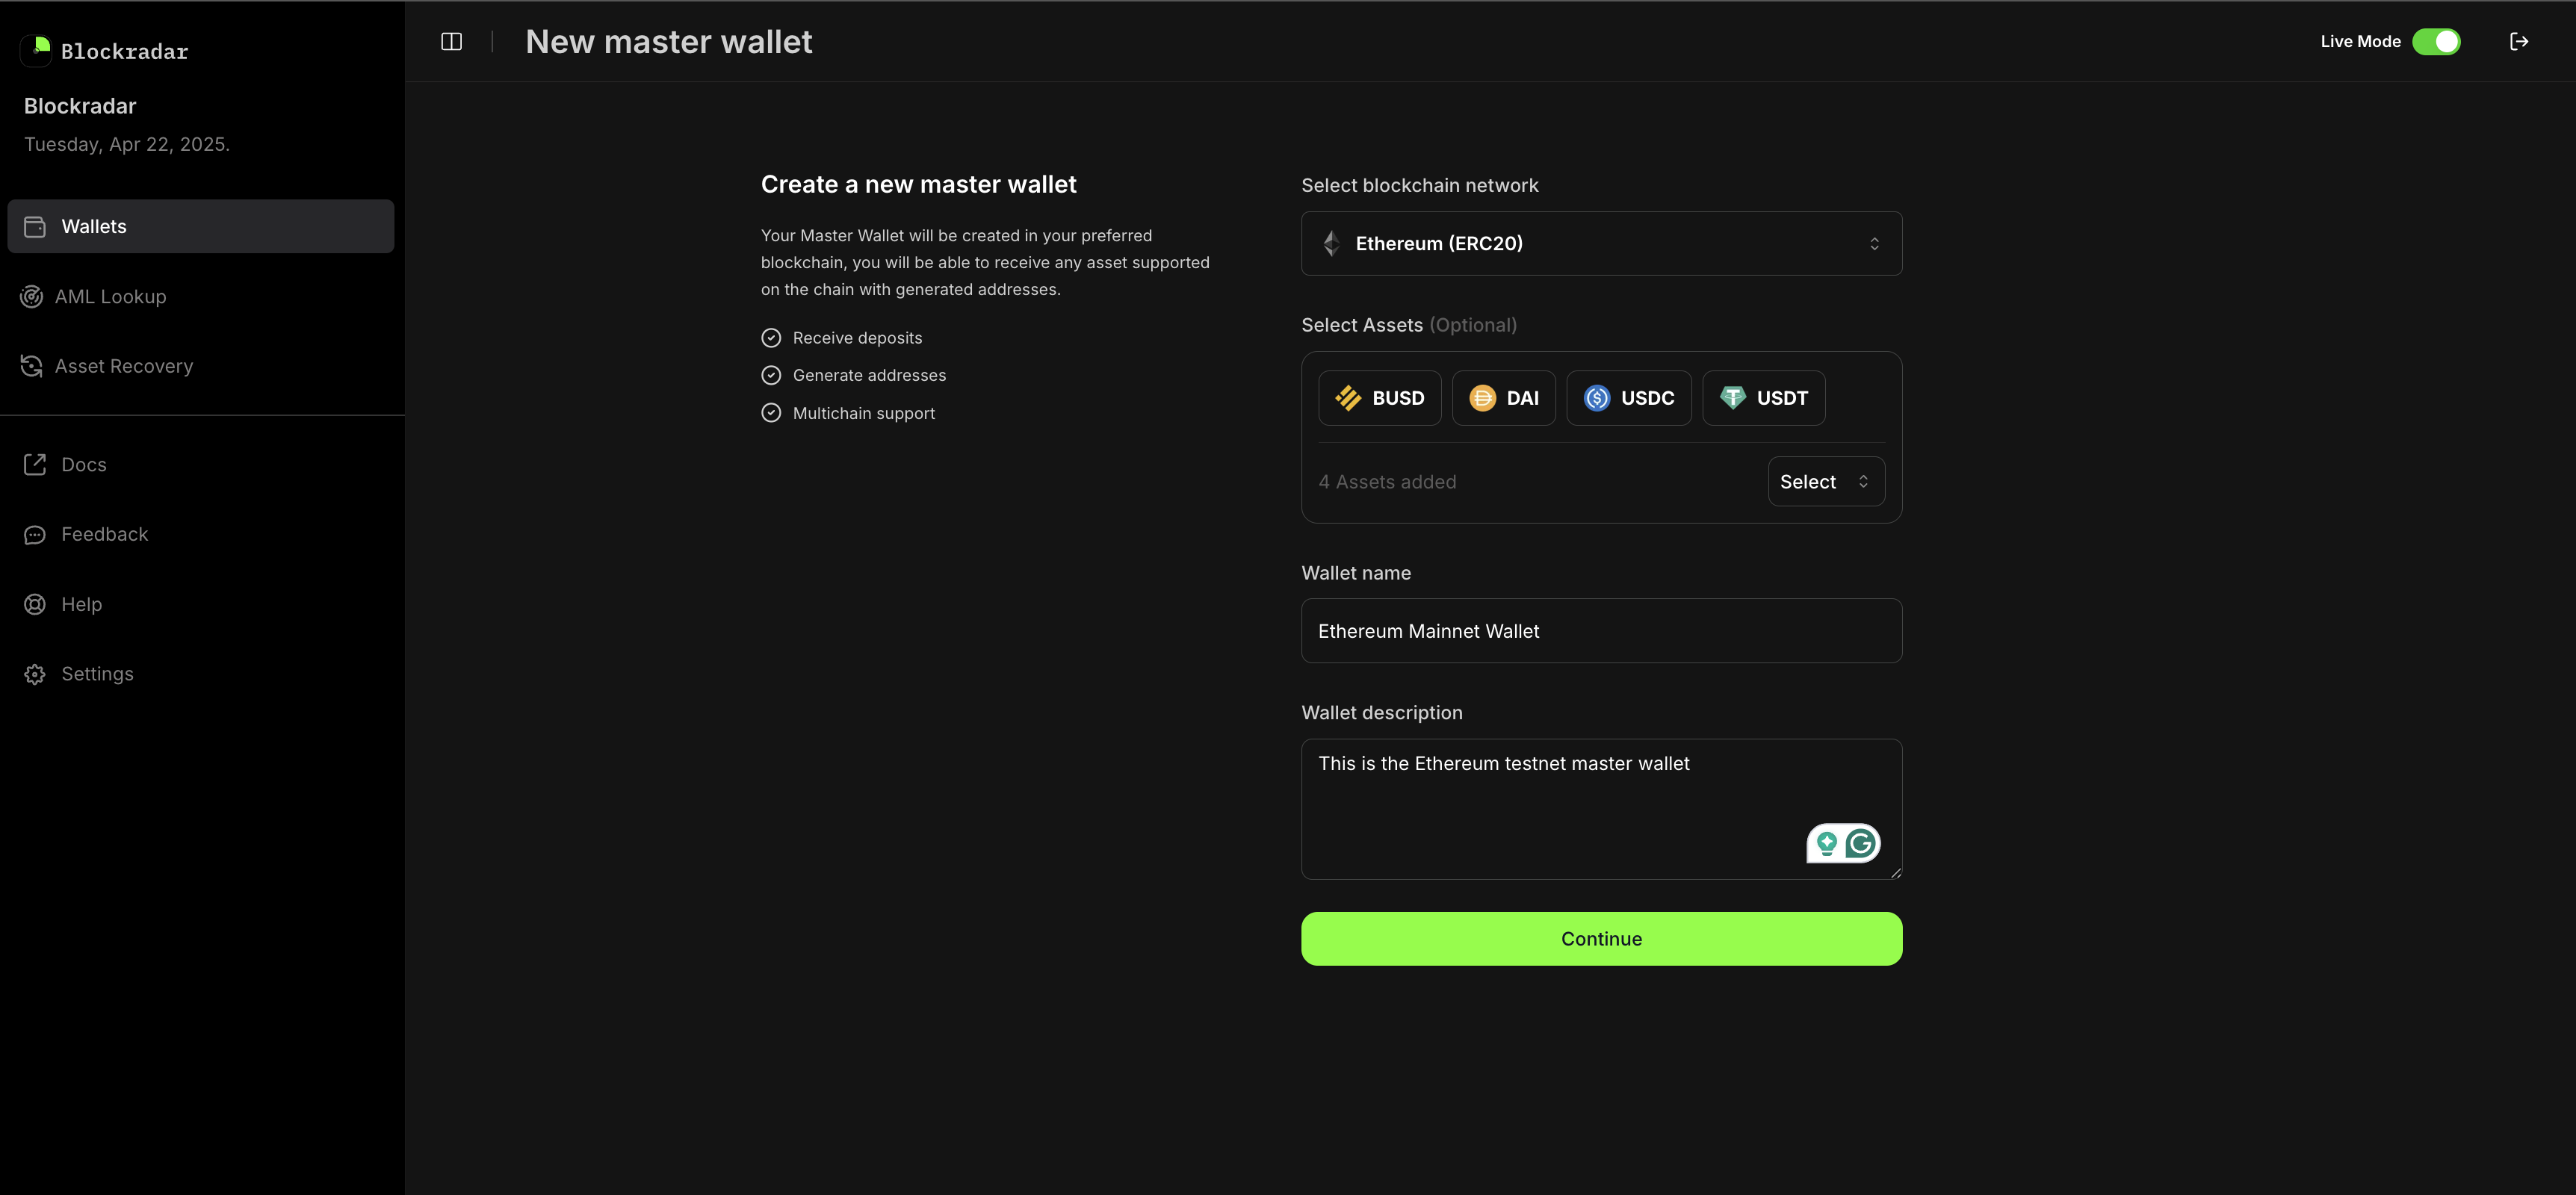
This screenshot demonstrates the process of generating a new master wallet via the Blockradar dashboard. This method is ideal for manual address creation or for teams who prefer a graphical interface.
One Master Wallet per blockchain. Blockradar allows only one Master Wallet per blockchain network per account. To support an additional blockchain, you must create a separate Master Wallet for it. Within a single Master Wallet, you can create as many child addresses as needed to segment funds by user, application, or purpose. Creating multiple Master Wallets for the same blockchain is not supported.
Wallet Configurations
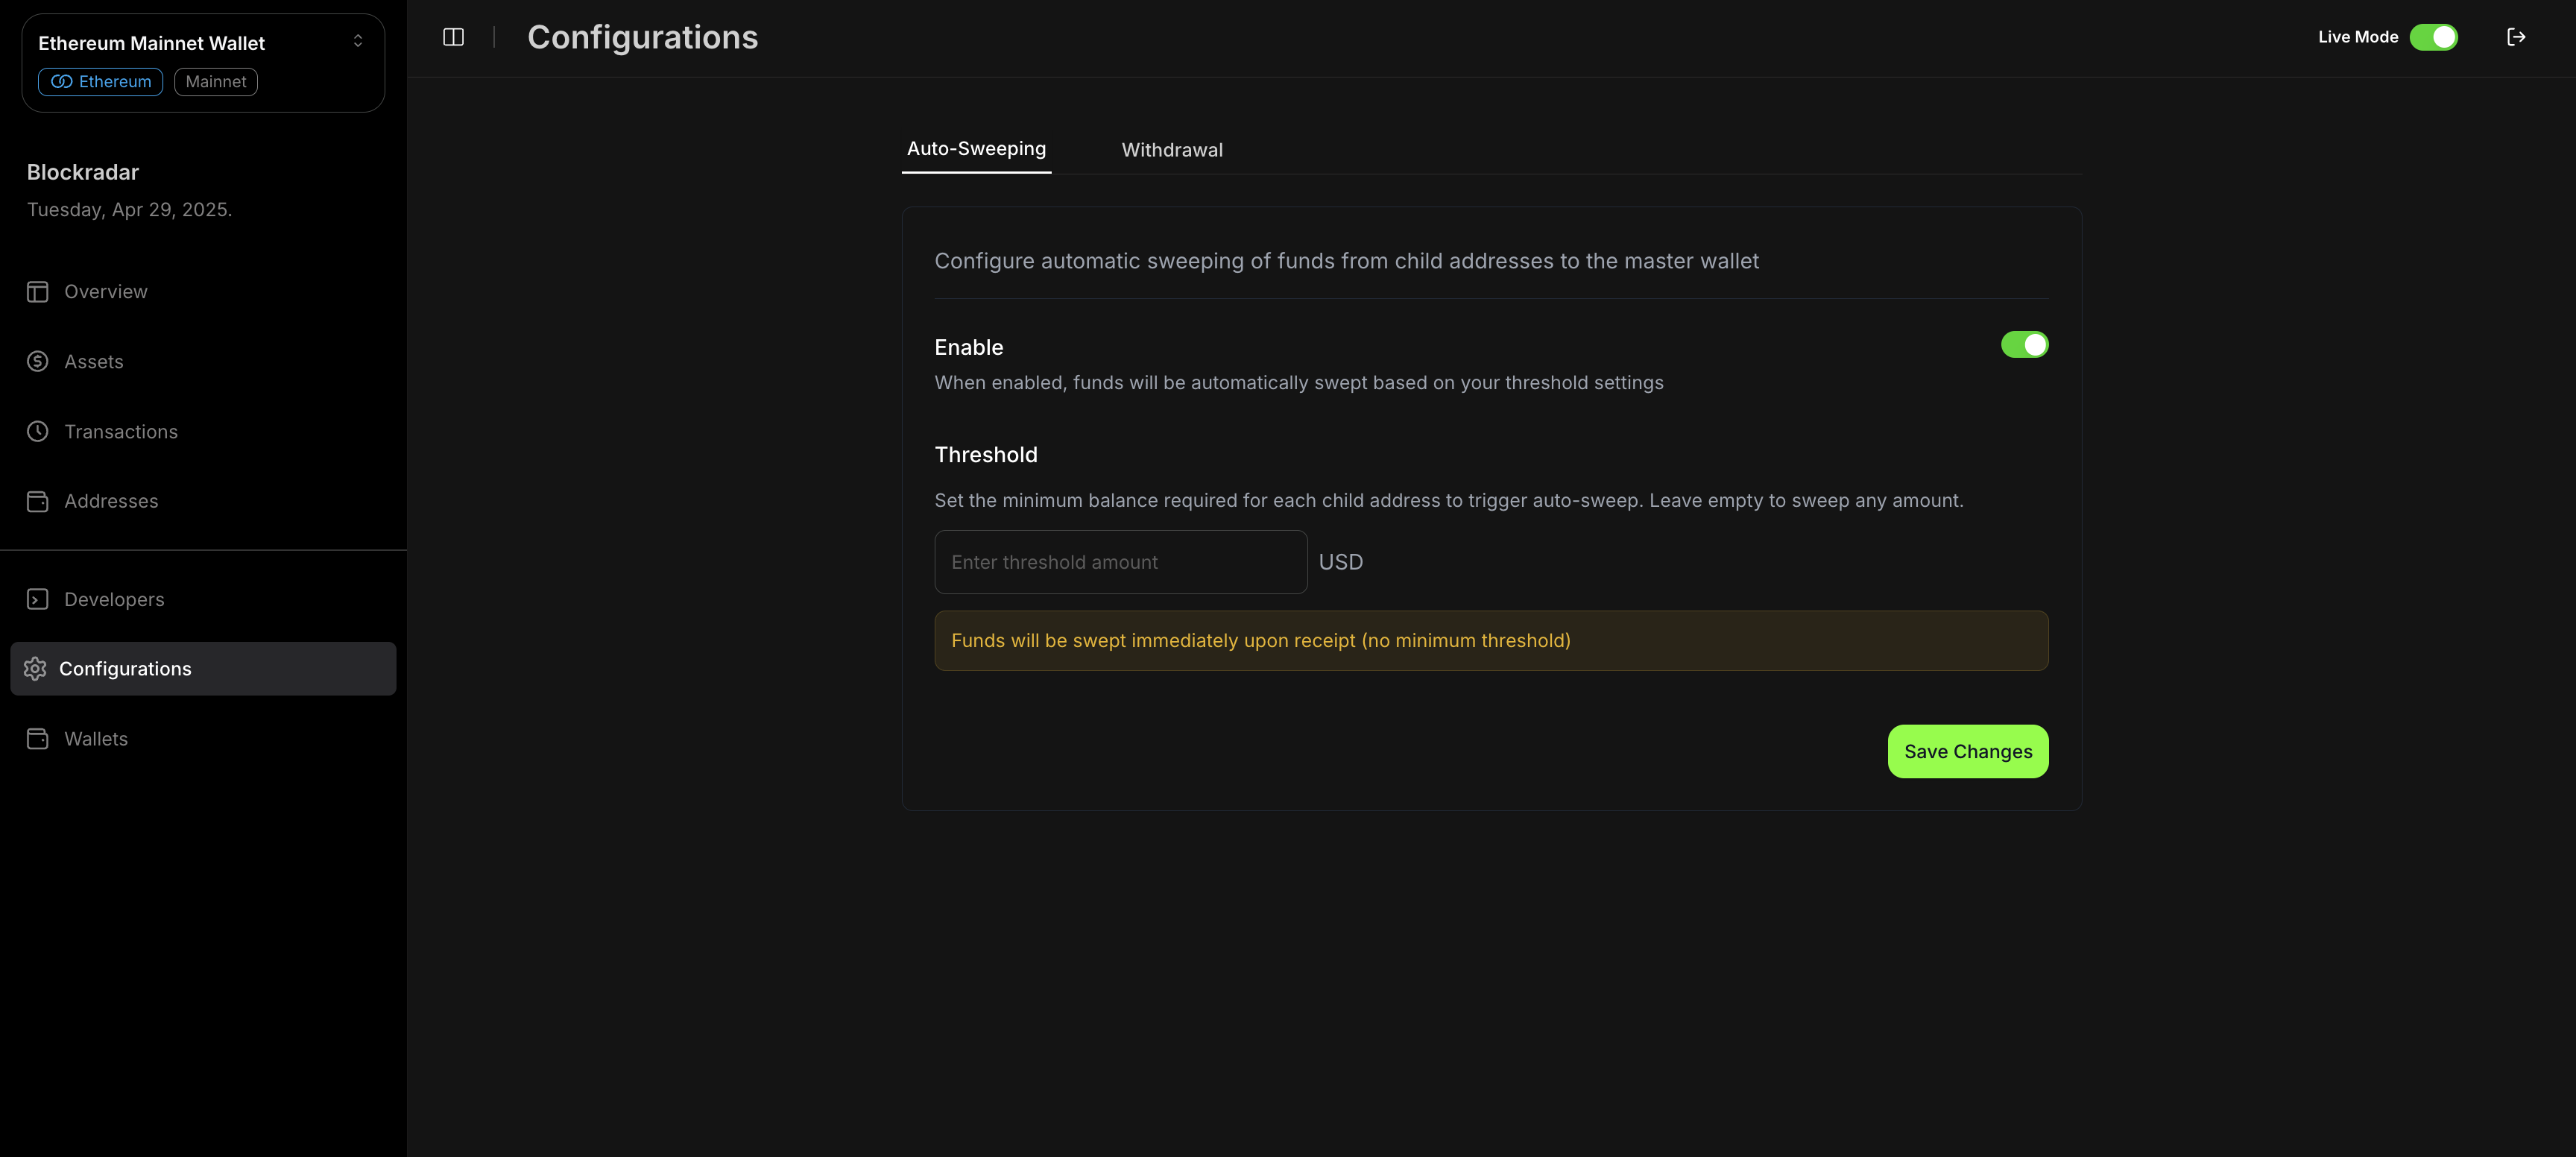
Blockradar master wallets support two key configuration options to help you manage funds and user experience: Auto Sweeping and Gasless Transactions.Auto Sweeping
EnableWhen enabled, funds deposited to addresses under this wallet will be automatically swept (transferred) to the master wallet. This helps consolidate balances, improves security, and simplifies fund management. Threshold
Set the minimum balance required for each child address to trigger auto-sweeping. If left empty, any amount received will trigger an auto-sweeping. This allows you to control how frequently sweeping occurs and optimize for gas fees.
- Default Setting: By default auto sweeping is set to true and threshold is 0
- Address Override: When generating or updating an address, you can override both the auto sweeping enable/disable and threshold settings for that specific address.
The
auto-sweeping and threshold settings on the addresses level will override the master wallet’s configuration for that address. This allows for granular control over auto-sweeping behavior per address.Enable auto sweeping and set an appropriate threshold to balance between timely fund consolidation and minimizing transaction fees.
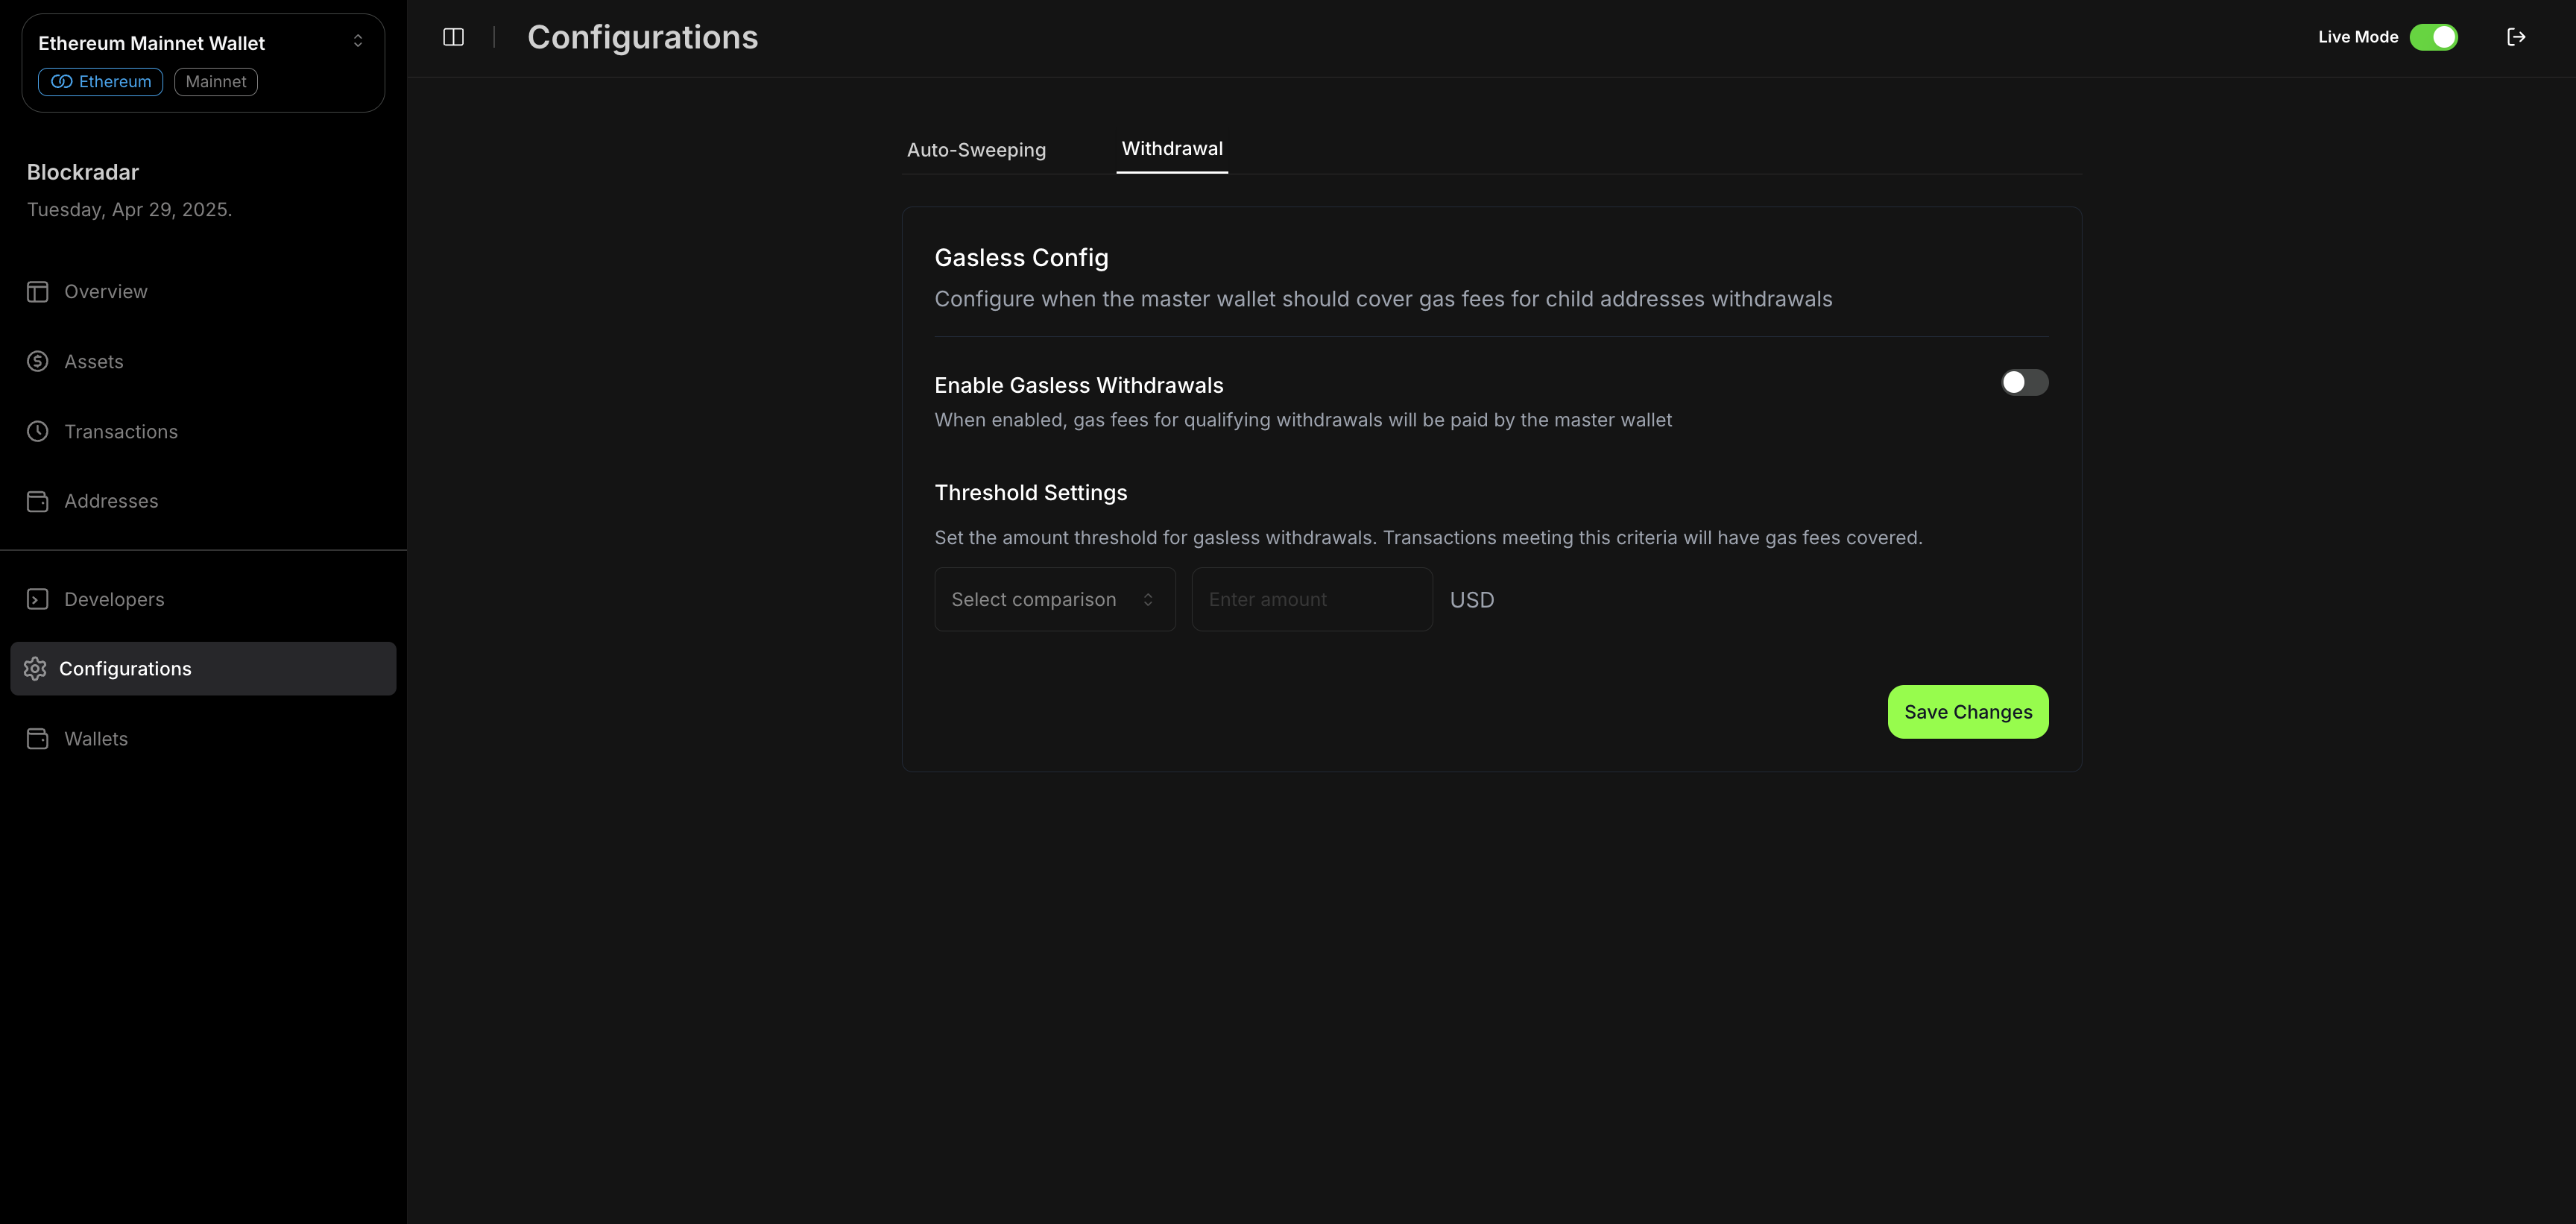
Gasless Transactions
Configure when the master wallet should cover gas fees for withdrawals from child addresses. Enable Gasless WithdrawalsWhen enabled, gas fees for qualifying withdrawals will be paid by the master wallet, providing a seamless experience for your users. Threshold Settings
Set the amount threshold for gasless withdrawals. Only transactions that meet this threshold will have their gas fees covered by the master wallet.
You can specify the threshold logic using arithmetic operators:
| Operator | Description | Example (Threshold = 100) |
|---|---|---|
gt | Greater than | Only withdrawals > 100 |
gte | Greater than or equal to | Only withdrawals ≥ 100 |
lt | Less than | Only withdrawals < 100 |
lte | Less than or equal to | Only withdrawals ≤ 100 |
eq | Equal to | Only withdrawals = 100 |
- Default Setting: Gasless Transaction is set to
falseby default and threshold settings are set to 0. - Address Override: When generating or updating an address, you can override both the enable/disable and threshold settings for gasless transactions for that specific address.
The enable
gasless transaction and threshold settings on the addresses level will override the master wallet’s configuration for that address. This allows for granular control over gasless withdrawal behavior per address.Enable gasless withdrawals and set appropriate threshold logic to balance user experience and operational costs.
- Set wallet-level configurations according to your business needs and security requirements.
- Use address-level overrides only when you need different behavior for specific addresses.
Funding
Funding a master wallet is essential for paying the gas fees on the blockchain whenauto-sweeping stablecoins from the dedicated addresses to the master wallet and for withdrawals to external wallets.
Test Environment
- Ethereum: Get test ETH here: Alchemy or Infura
- Binance Smart Chain: Get test BNB here: Faucet
- Polygon: Get test MATIC here: Polygon PoS (Amoy)
- Base: Get test ETH here: Alchemy
- Optimism: Get test ETH here: Alchemy
- Arbitrum: Get test ETH here: Alchemy
- Tron: Get test TRX here: Faucet
- Solana: Get test SOL here: Faucet
- Celo: Get test CELO here: Faucet
Live Environment
For the live environment, you can send assets from any wallet or exchange that supports the native assets on each of the blockchains.Sweeping
Always ensure you have enough balance in your master wallet to avoid delays in auto-sweeping or withdrawals. We will notify you when your master wallet balance is low.
Always ensure you have enough balance in your master wallet to avoid delays in auto-sweeping or withdrawals. We will notify you when your master wallet balance is low.
Gas Fees: Test vs Live Environment
Understanding the differences in gas fees between test and live environments is crucial for efficient development and deployment.Test Gas Fees
In test environment, gas fees are minimal. Testnets are designed to simulate the mainnet environment without the associated real-world costs. As a result, small amounts of native gas in a testnet can be used for an extended period. This allows developers to test and iterate their integration without incurring significant expenses.Live Gas Fees
In a test environment, gas fees represent real-world expenses. These costs can vary significantly based on the blockchain and network congestion. Properly estimating and managing gas fees is essential to ensure the smooth operation of your applications and to avoid excessive costs. By leveraging testnets for development and testing, you can minimize expenses and ensure your solutions are robust before deploying to the mainnet.Deposit Finder
In rare cases, you might not receive a webhook from our system after a customer sends stablecoins to any of the addresses issued to them. We have an deposit finder mechanism built internally, but you also have the ability to trigger a rescan of the blockchain for a missing transaction using the Deposit Finder API by providing thetransactionHash
Body parameters
The required parameter is
The required parameter is
transactionHash, which can be obtained from either the original transaction record or by looking up the transaction on the blockchain explorer.Happy hacking! ❤️